
This post may contain affiliate links. As an Amazon Associate, I earn from qualifying purchases - at no extra cost to you.
Transform your lawn with 21 Christmas yard decorations, including glowing tree canopies, immersive light tunnels, giant ornaments, and musical displays.
The best Christmas yard decorations do more than make your lawn sparkle. They change how people experience the space. Guests walk beneath glowing trees, follow a light-lined driveway, look up at floating ornaments, or watch a moving projection cover the house.
The secret is to decorate surfaces, sightlines, and pathways, not just scatter objects across the grass. You can create that immersive effect with a few well-planned zones instead of buying dozens of unrelated decorations.
1. Tree Canopy Light Wrap: From Trunk to Crown ✨
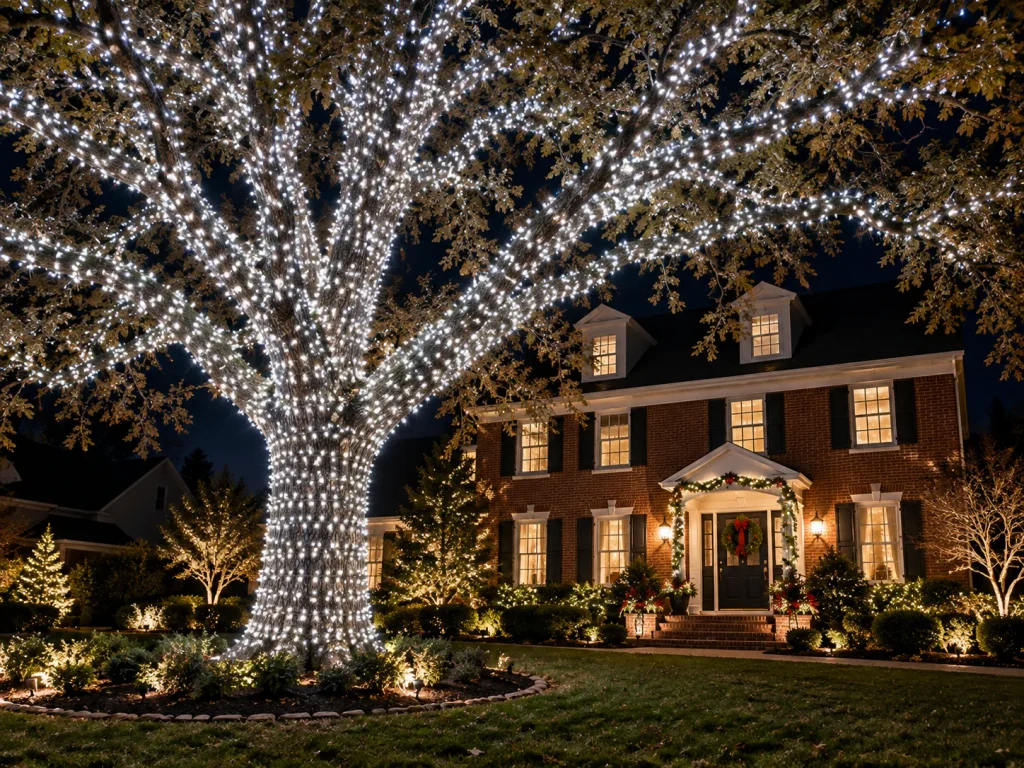
Wrapping a medium tree from trunk to crown can cost roughly $45–$150 per tree, depending on its size, light density, and the strands you already own. The visual payoff is substantial: the tree reads as one glowing structure instead of a dark trunk with a few scattered lights.
Start by wrapping the trunk in close, even spirals. Continue along the main branches, then add lights to selected outer limbs to reveal the canopy’s shape. Two fully wrapped trees beside a walkway can frame the entrance more effectively than several trees with loosely draped strands.
Use outdoor-rated lights, secure them without damaging the cord insulation, and plan the power route before decorating. The Electrical Safety Foundation International’s outdoor decoration guidance recommends outdoor-rated cords, secure fastening, and avoiding overloaded outlets.
Cost range: $45–150 per medium tree Setup time: 2–3 hours per tree Surface transformed: Tree, from trunk to canopy Power needed: Outdoor-rated extension cord and suitable outdoor outlet
2. Ground-Level Light Field Across the Lawn 🌟
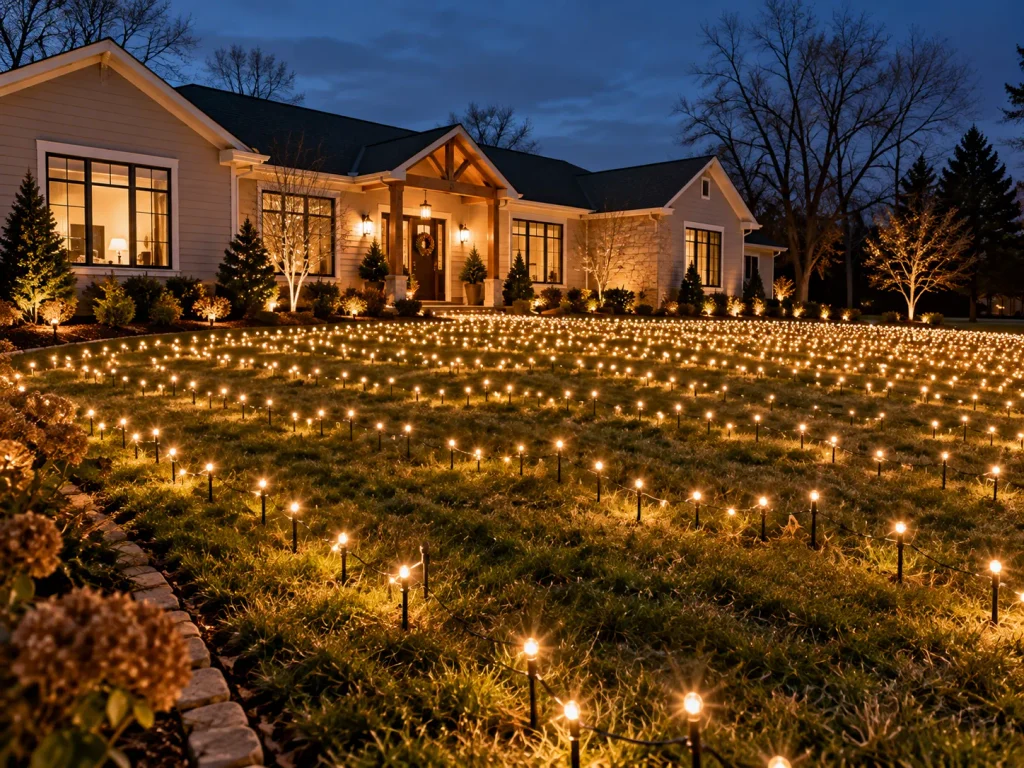
Instead of hanging every light overhead, arrange outdoor-rated light stakes in a broad grid across part of the lawn. From the street, the repeated points of light form a glowing field that makes the grass itself look illuminated.
The effect depends on spacing. A few scattered stakes look random; a consistent pattern creates visual texture. Leave a darker strip or curved opening through the field to draw the eye toward the front door.
Verdict: A carefully spaced light field can make an ordinary lawn feel larger and more immersive without filling it with bulky decorations.
3. Life-Size Silhouette Cutout Scenes 🦌
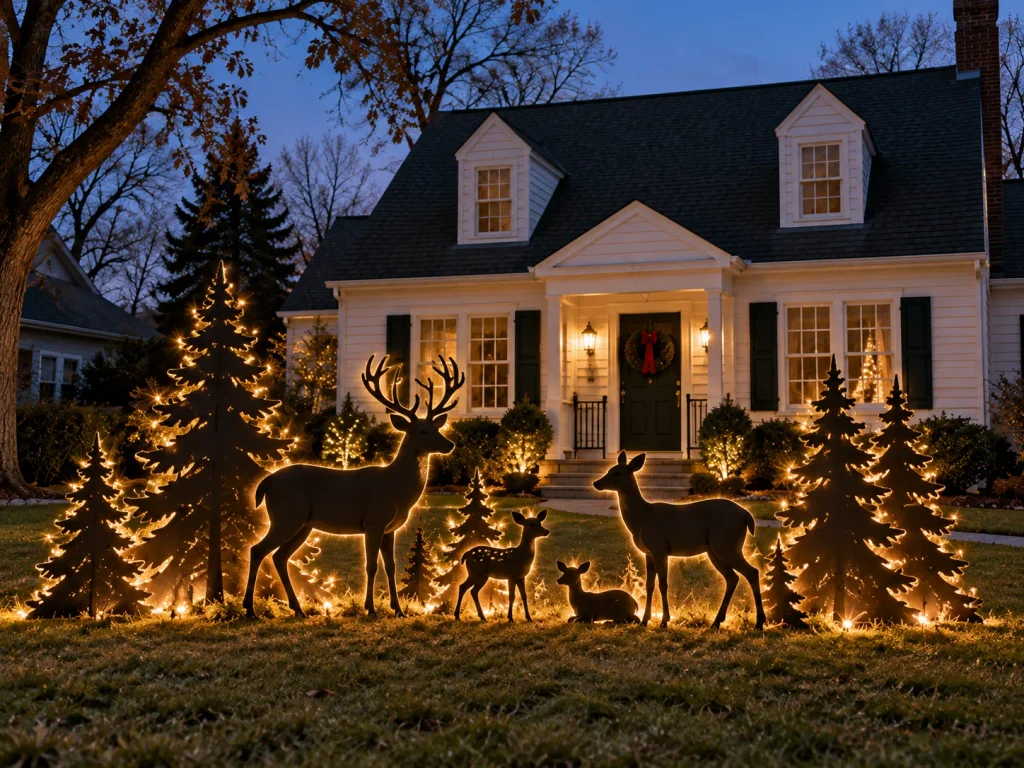
Start with a story rather than a collection of figures. Cut life-size silhouettes of a sleigh, reindeer, trees, or a family carrying presents from exterior-grade plywood, then paint them matte black so their shapes remain visible during the day.
Arrange the figures along the lawn edge, overlapping them slightly from the viewer’s angle. Add a restrained line of lights around selected outlines, or place a spotlight behind the scene to create dramatic shadows.
Nobody needs a dozen separate lawn ornaments when three well-positioned silhouettes can tell a complete story. Use secure ground supports, exterior-suitable materials, and a nearby outdoor-rated power source if you add lighting.
4. Inflatable Archway Tunnel Over the Walkway 🎈

Your front path may connect the driveway to the door, but without lighting or height, guests simply hurry across it. An inflatable Christmas archway turns that empty walkway into a passage through the display.
Choose an arch or connected archway sections that leave comfortable clearance for people carrying bags or pushing strollers. Anchor the unit according to its instructions, and avoid placing its blower or cables where people walk.
Cost: $80–200 | Time: 30–60 min | Power: Suitable outdoor outlet and outdoor-rated cord, if required
5. Projected Snow or Moving Scene on the House Face ❄️
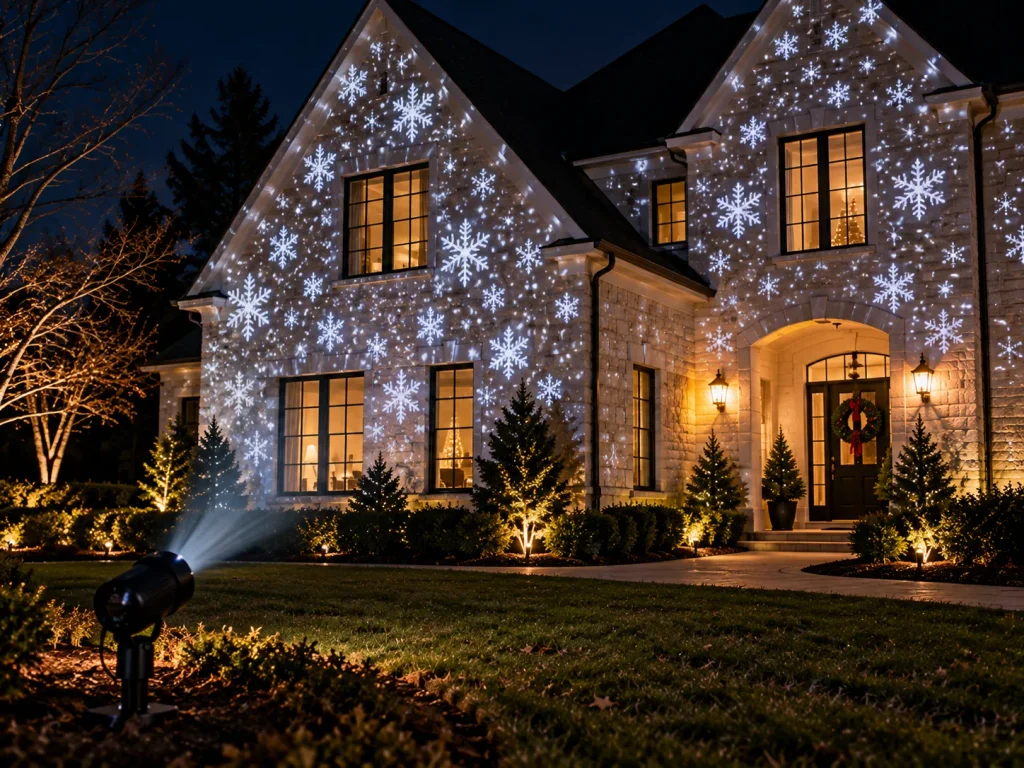
Make the house the show.
A moving projection covers far more visual space than another light-up lawn figure. Aim a suitable outdoor projector at a clear section of the house wall, then adjust its position until the animation fills the surface without spilling excessively onto windows or neighboring properties.
Choose falling snow for a calm winter scene or moving stars and festive patterns for a more playful effect. Darker surfaces and unobstructed walls generally make projection easier to appreciate; test the effect after sunset before finalizing the position.
Check the projector’s outdoor-use and weather-rating instructions, and keep its power connection protected as directed by the manufacturer.
Cost range: $50–250 Setup time: 30–60 minutes Surface transformed: House wall or front facade Power needed: Standard outlet with an appropriately rated outdoor power connection
6. Overhead Light Canopy Across Yard (Zigzag From House to Trees) ✨
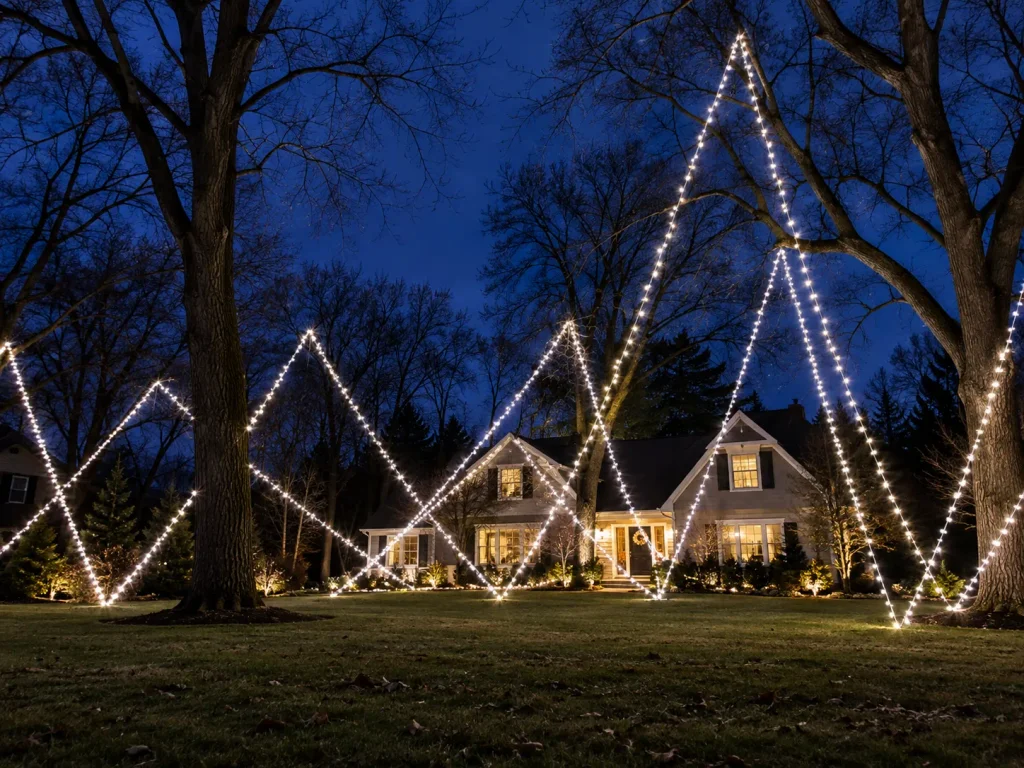
It’s dusk, guests are crossing the lawn, and they look up to find a ceiling of warm Christmas lights stretching from the house to the trees. Instead of leaving the sky above the yard dark, run outdoor-rated light strands in a zigzag pattern between suitable attachment points, varying the angles slightly to create a broad canopy. From below, the crossing lines form an immersive ceiling that makes the yard feel like an outdoor Christmas room.
Keep the strands high enough to maintain safe clearance for people and vehicles, and use attachment hardware designed for the installation. Never attach lights to weak branches or let cords hang across a walkway. Check the light manufacturer’s instructions for outdoor use, spacing, and power limits.
Verdict: The zigzag canopy turns empty air into the display—and makes guests feel as if they’ve stepped inside Christmas.
7. Giant Illuminated Gift Boxes on the Lawn 🎁
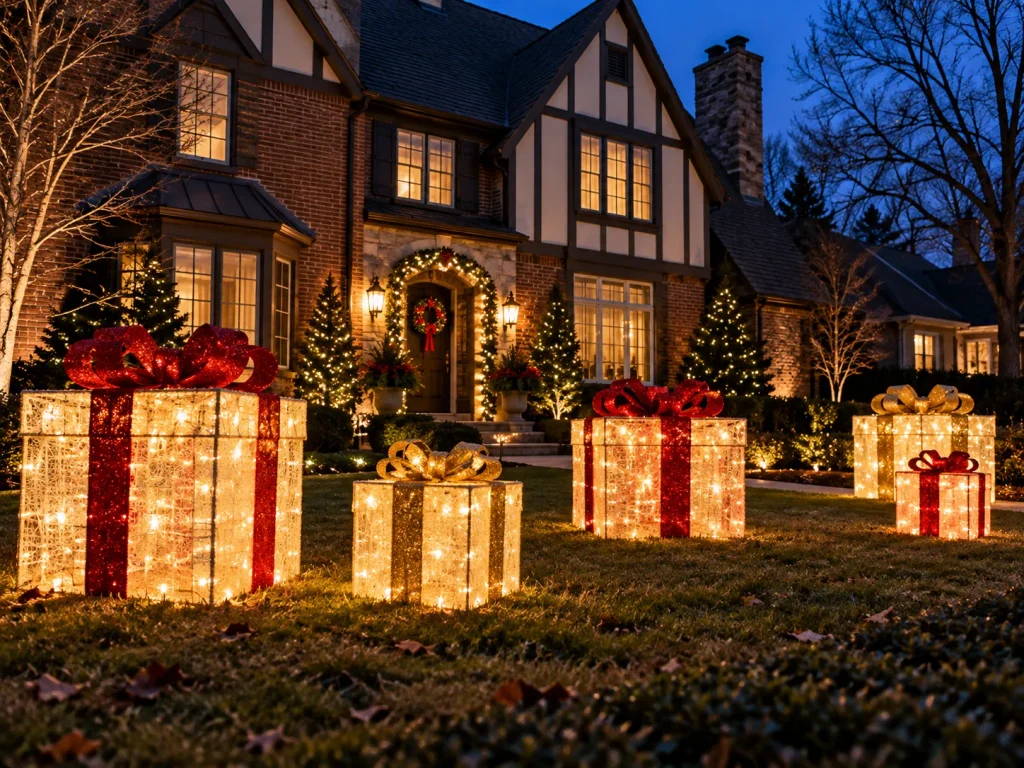
Small wrapped gifts can disappear against a large lawn. Oversized gift boxes solve the scale problem by turning the lawn into a giant present display that can be seen from the street.
Group three boxes in graduated sizes rather than spacing them evenly across the grass. Repeat one ribbon color across all three, then place the tallest box toward the back to create depth. Weather-resistant illuminated gift boxes are convenient; DIY frames covered in outdoor-suitable material can offer more control over size and color.
Keep electrical connections protected according to their product instructions. For a display without nearby power, use suitable battery-operated or solar options where available.
The design verdict: one coordinated cluster beats a lawn full of unrelated oversized objects.
8. Tree-Trunk Gift Wrapping With Fabric and Bows 🎀
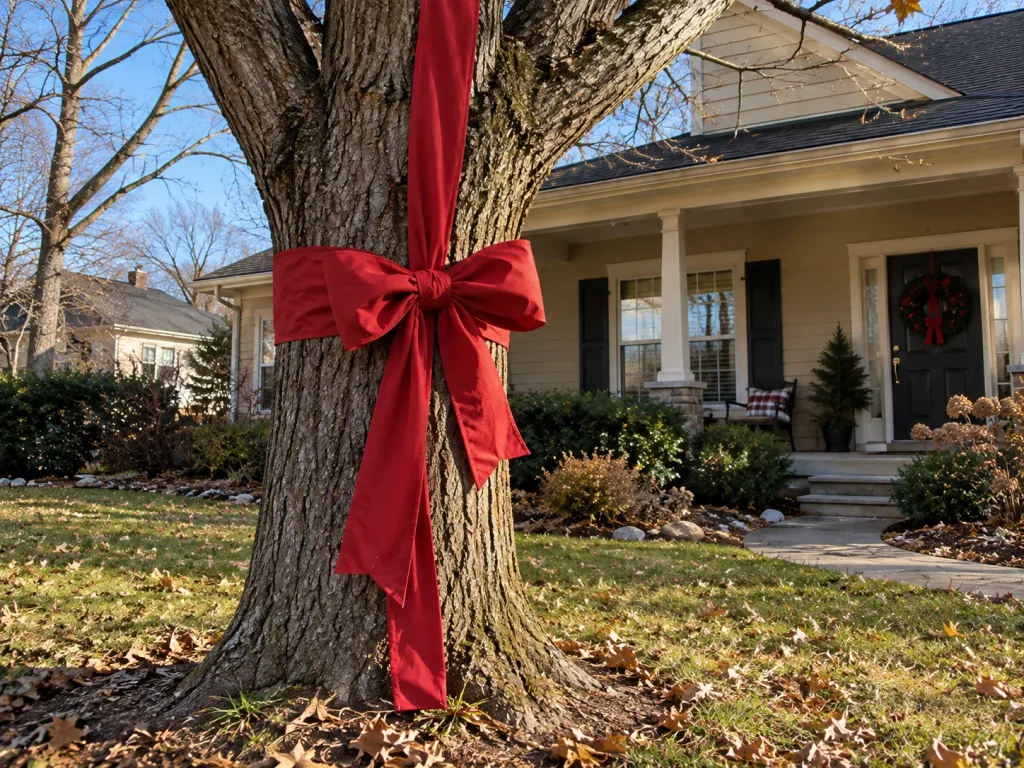
Wrapping every tree in ordinary wrapping paper is a mistake: moisture can ruin it, wind can tear it, and the result may look messy within days. Instead, use broad outdoor-suitable fabric or weather-resistant decorative bands around selected tree trunks.
Begin with a base wrap, smooth the material so it sits evenly, and finish with a large bow on the front-facing side. Repeat the same color on two or three trees to create a visual rhythm along the driveway.
Avoid tightly constricting living trunks or using fasteners that damage bark. Keep the decoration loose enough to accommodate the tree and remove it after the season.
Cost: $20–60 | Time: 30–60 min | Power: None for fabric-only decor; nearby outdoor outlet if adding lights
9. Fence-Line Light Curtain 🌠
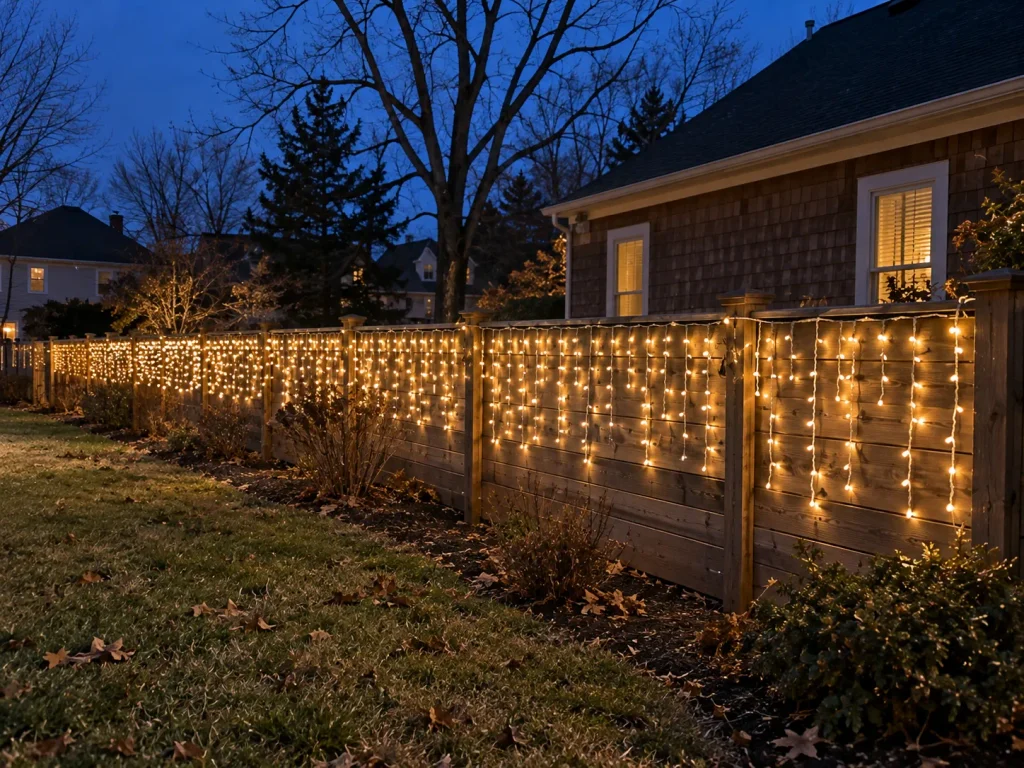
A long fence can look like a dark wall even when the lawn is decorated. A light curtain changes that entire fence plane into a glowing backdrop, making foreground silhouettes, ornaments, or gift boxes stand out.
For a short fence, one curtain may be enough. For a longer boundary, connect multiple compatible sections with consistent spacing and a shared light color. Warm white feels elegant; multicolor creates a livelier neighborhood-display look.
At a rough budget of $40–$180, the cost depends on fence length, light density, and whether you already have outdoor-rated strands. Measure the fence before buying so you don’t end up with an awkward dark gap at one end.
Cost range: $40–180 Setup time: 1–3 hours Surface transformed: Fence plane Power needed: Outdoor-rated extension cords and suitable outlets; check each product’s connection limits
10. Mirror “Ice Pond” on the Lawn 🧊
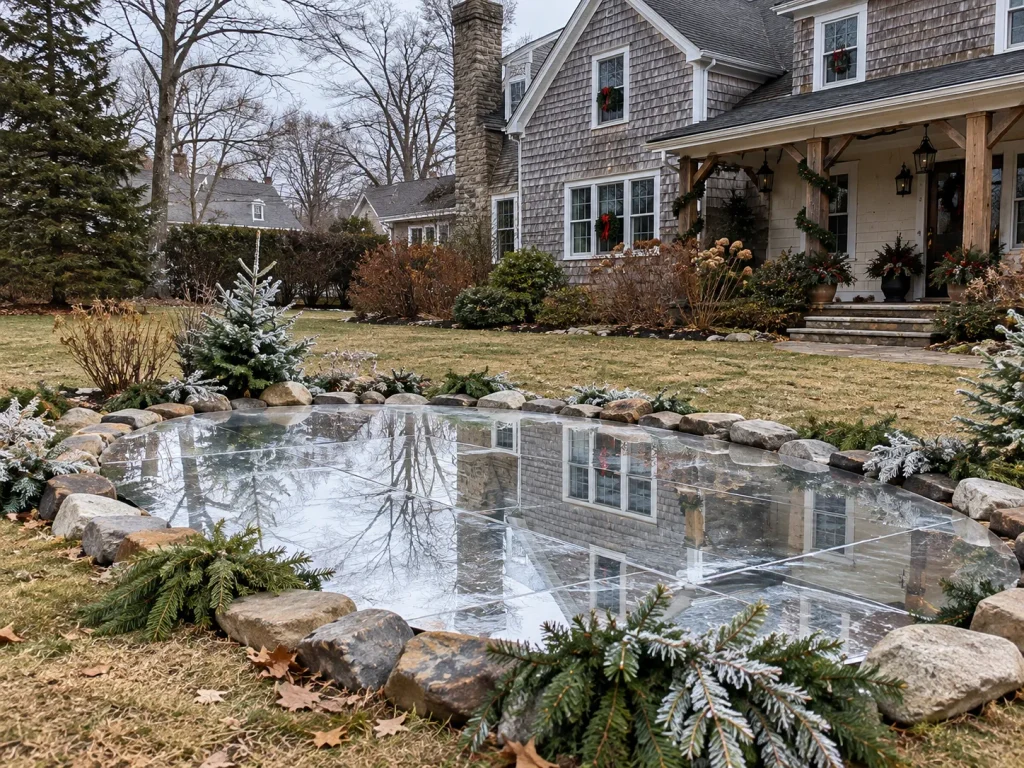
The effect comes from reflection rather than adding more lights. A flat, reflective panel placed within a controlled display area can catch nearby tree lights and create the illusion of a glowing frozen pond.
Position it where the reflected lights are visible from the approach, then surround the edge with faux snow, low greenery, or small blue-white lights. A reflective acrylic panel may be easier to handle than glass, but it still needs a stable, flat placement.
Keep the surface away from the main walking route. Rain, frost, and wind can make a reflective panel slippery or unstable, so don’t use it where guests might step on it.
Verdict: Use the mirror effect as a visual focal point not a walking surface and secure it against movement.
11. Scattered Light Orbs Across the Lawn 🌕
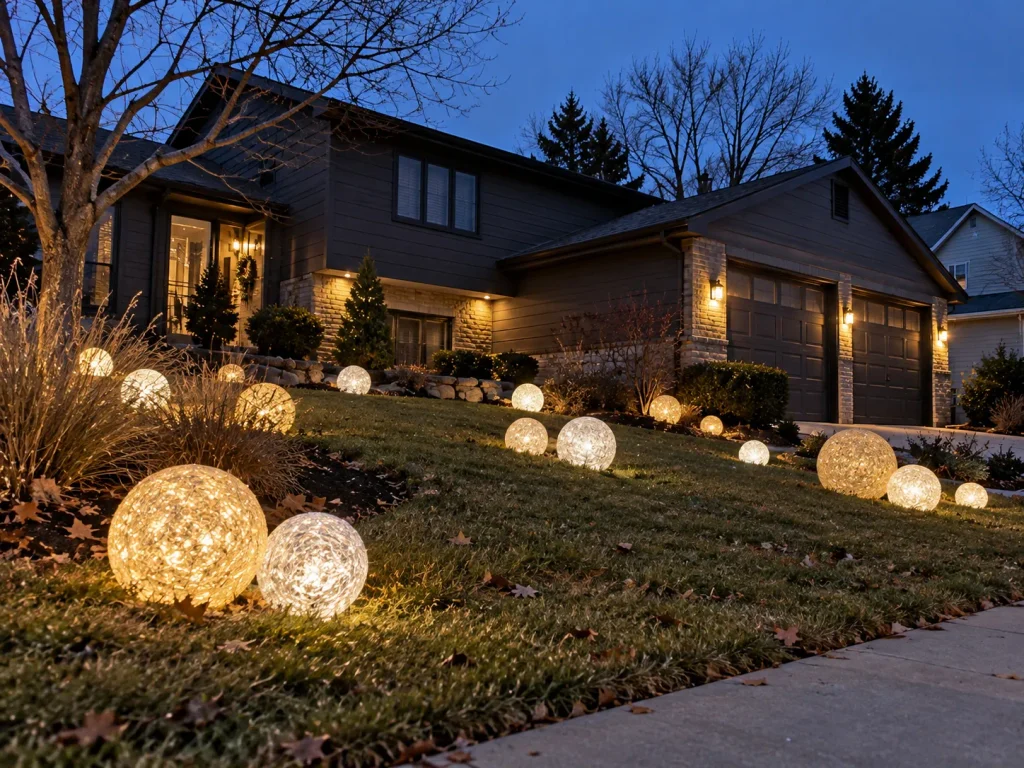
Start with the largest glowing orb near the back of the lawn, then place medium and small spheres closer to the walkway. This staggered arrangement creates depth and gives the eye a route through the display.
Use one color temperature for a refined look or mix warm white and soft blue for a winter-night effect. Leave some grass visible between the spheres; covering every inch can make the scene look flat instead of layered.
For a DIY version, place outdoor-rated illuminated spheres on stable bases and keep cords away from walking routes. Battery-powered versions can simplify placement where outlets are limited.
Design verdict: Think of the orbs as a constellation spread across the lawn, not a row of garden lights.
12. Roofline Light Outline Around the Full Perimeter 🏠
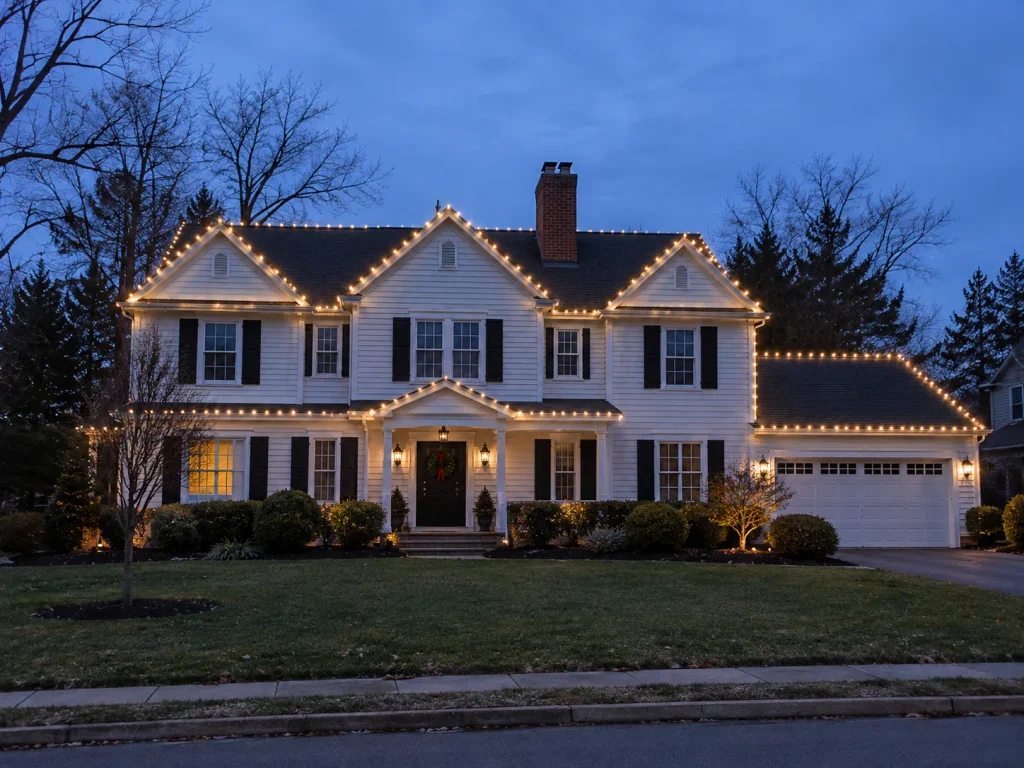
Outline the whole roof or skip the partial look.
A consistent line of lights along the roofline makes the house read as one defined shape from the street. Follow the main eaves and gables, keeping spacing and bulb direction consistent instead of changing styles halfway across the facade.
The roofline is a high-visibility feature, but it is also one of the most demanding areas to decorate. Do not attempt a second-story installation if you cannot reach it safely; consider a professional installer instead.
Cost: $100–400+ | Time: 3–6 hrs | Power: Multiple outdoor outlets may be needed; calculate the load before connecting strands
13. Driveway Light Pathway Bordered on Both Sides 🚗
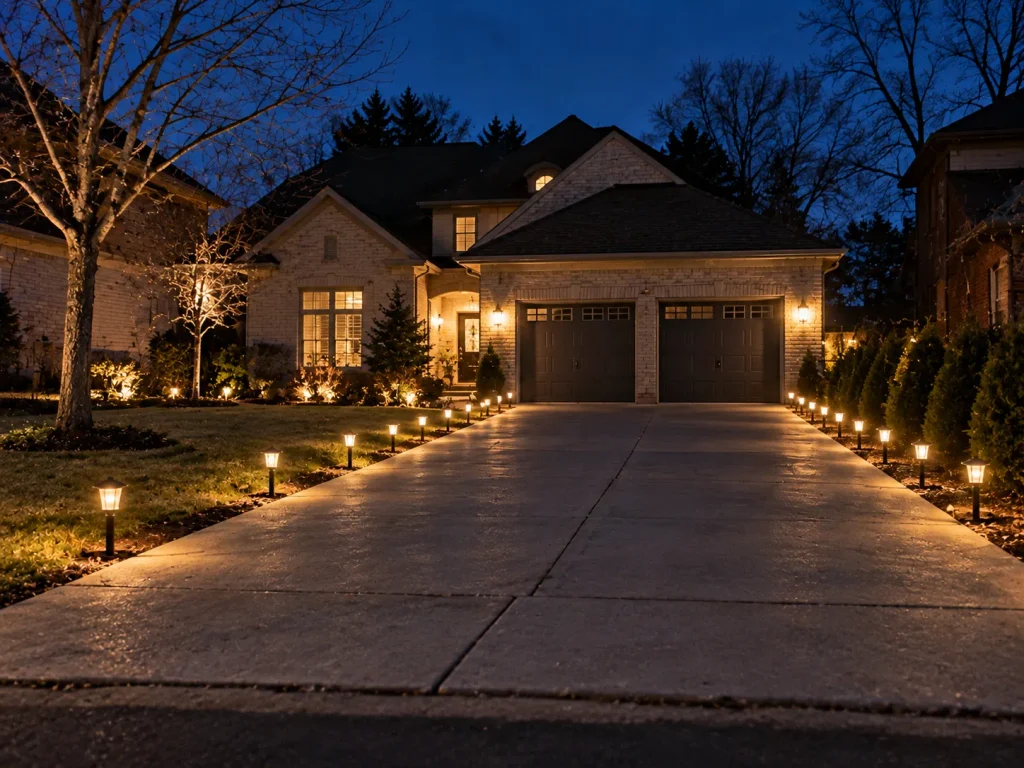
A decorated lawn can still feel disconnected when the driveway remains dark. The solution is to frame both sides of the driveway with continuous low-level lighting so the approach becomes part of the display.
Use matching lanterns, low illuminated arches, or closely spaced outdoor-rated lights along both edges. Start at the street entrance and repeat the same spacing all the way to the house. A gentle curve can make a long driveway feel like a journey rather than a route to the garage.
For a dramatic version, combine the borders with a glowing tree canopy at the far end. Keep the driveway clear of cords and decorations that could interfere with vehicles or snow removal.
Cost range: $80–300 Setup time: 1–3 hours Surface transformed: Driveway and approach Power needed: Outdoor-rated extension cords and suitable outlets, or compatible low-voltage lighting
14. Hanging Oversized Ornaments From Branches ✨
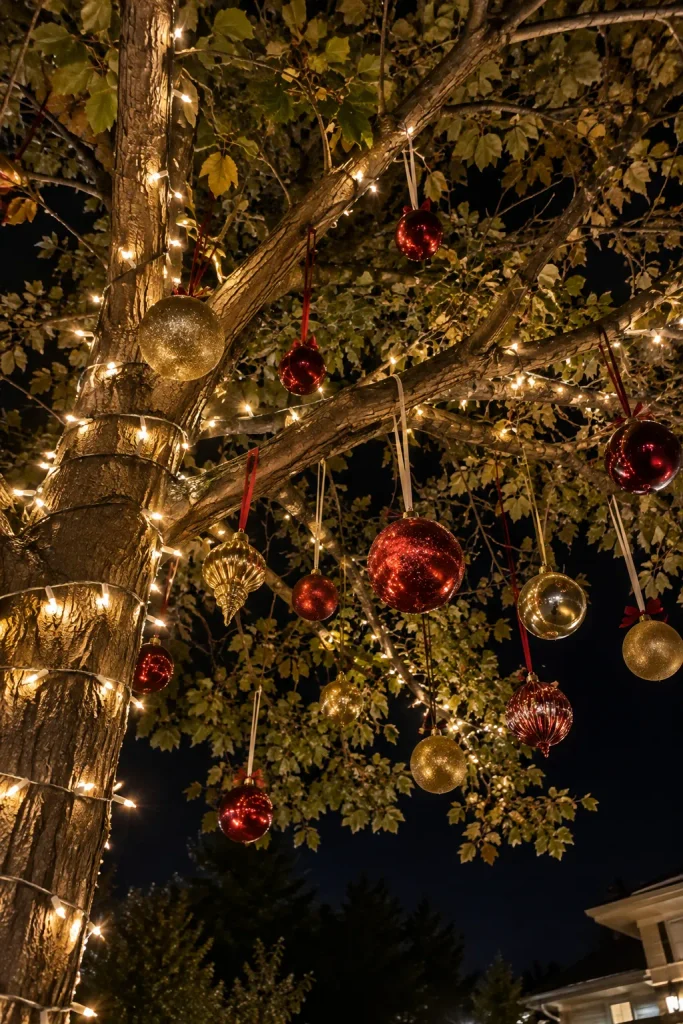
Imagine walking beneath a tree where large gold, red, and champagne ornaments hang overhead like a festive ceiling. The overhead branches become part of the display, and guests experience the decorations from below instead of seeing everything at ground level.
Choose lightweight, shatter-resistant ornaments and vary the hanging lengths. Concentrate them above a visible section of the walkway or near the entrance, leaving the main walking clearance open.
Verdict: Hang ornaments where people naturally look up, and use secure attachment points rather than relying on thin decorative hooks alone.
15. Vintage Sleigh Display 🛷
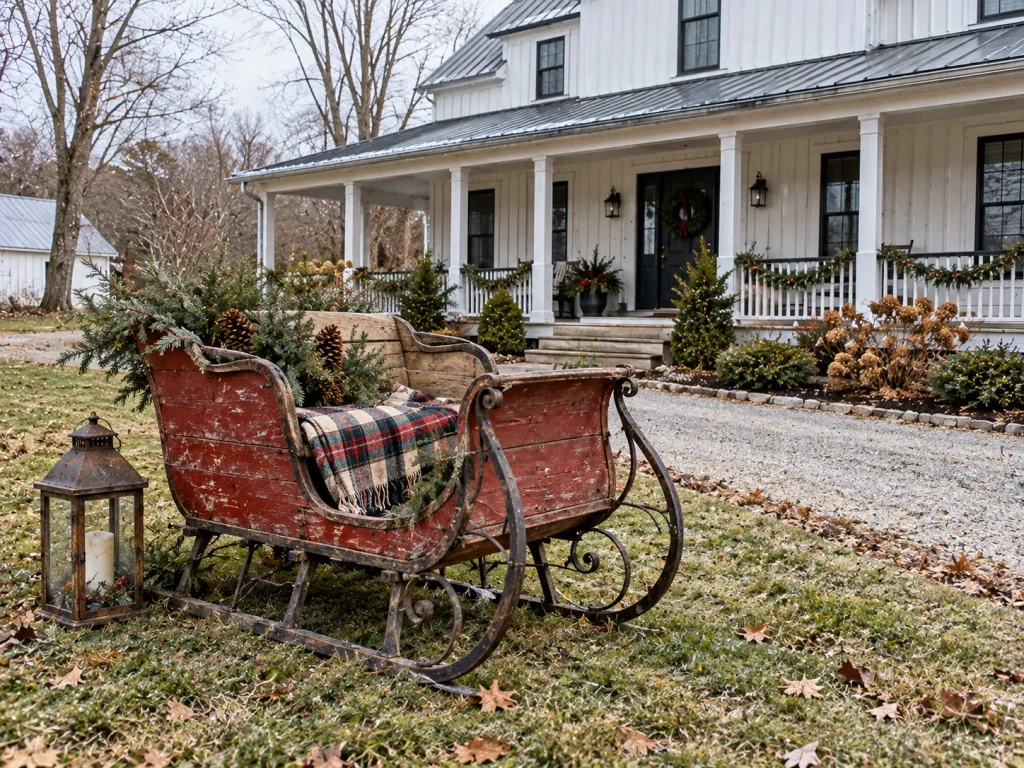
A vintage sleigh gives the lawn focal point a strong silhouette and a sense of movement, even when the rest of the display is relatively simple. Unlike giant illuminated gift boxes, which feel modern and graphic, a sleigh brings a nostalgic story to the scene.
Place it at a slight angle rather than directly facing the street. Add evergreen branches, a plaid blanket, and a few wrapped boxes, then light it from the side so its shape remains visible after dark.
A secondhand sleigh or decorative replica may cost less than a large illuminated installation, while a new full-size piece can be considerably more expensive. Keep fabric and untreated wood protected from prolonged wet weather.
Design verdict: Let the sleigh be the hero; a few supporting details will look more convincing than a pile of unrelated props.
16. Life-Size Nutcracker Sentries Flanking the Walkway 🎖️
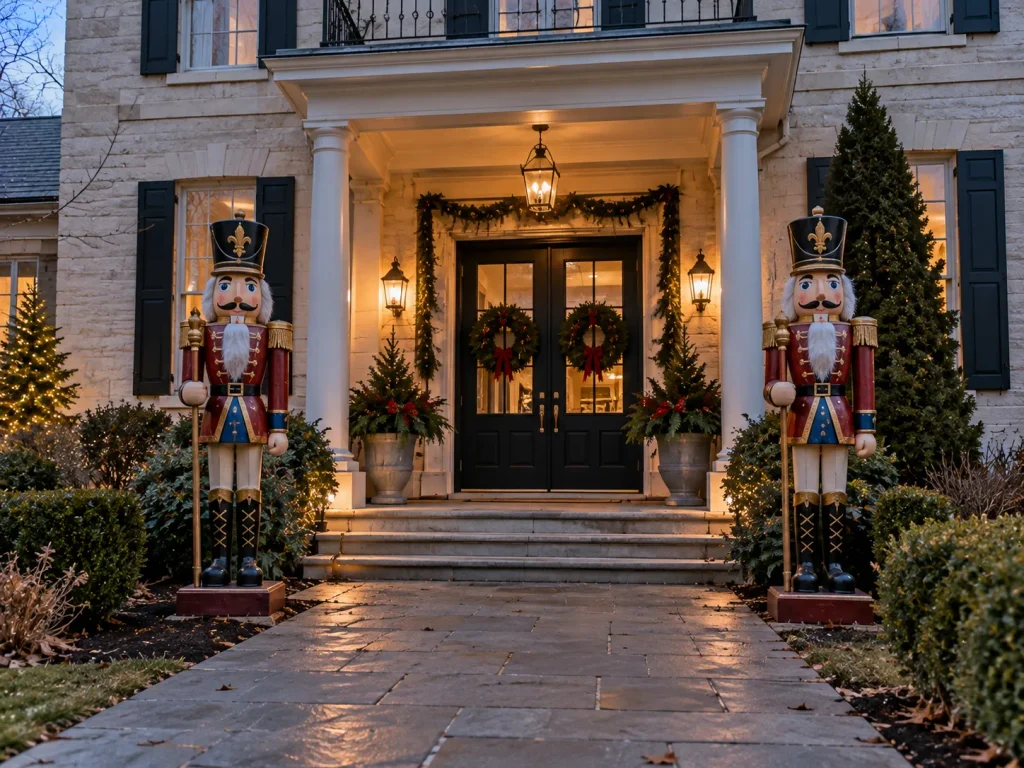
The mistake is placing two tall Nutcrackers too close to the path, where they narrow the entrance or get knocked over by guests. Instead, position them on opposite sides of the walkway entrance, with enough clearance for people to pass comfortably.
Choose matching figures and repeat their main colors in nearby ornaments or ribbon. Secure each figure according to its base design and the expected wind conditions; tall decorations can be unstable if they are simply placed on the grass.
Cost: $100–350 per pair | Time: 30–60 min | Power: None for unlit figures; outdoor outlet for illuminated models
17. Lantern Glow Walkway With Floor-Level Lanterns 🏮

You don’t need a complicated light tunnel to make the approach feel special. A sequence of lanterns placed at different heights along the walkway edges creates a warm, low-level glow that guides guests toward the house.
A budget version using several simple lanterns can cost around $60–$150. More elaborate metal lanterns or coordinated LED sets may cost more, but the visual principle stays the same: repeat the shape and light color, and let the spacing lead the eye.
Arrange the first pair at the path entrance, then continue in a consistent rhythm. Keep lanterns outside the walking surface, use flameless candles, and choose products intended for the weather they will face.
Cost range: $60–150 Setup time: 45–90 minutes Surface transformed: Walkway edges Power needed: None for battery lanterns; suitable outdoor power for plug-in models
18. Giant Snowflake Projection on the Garage Door ❄️
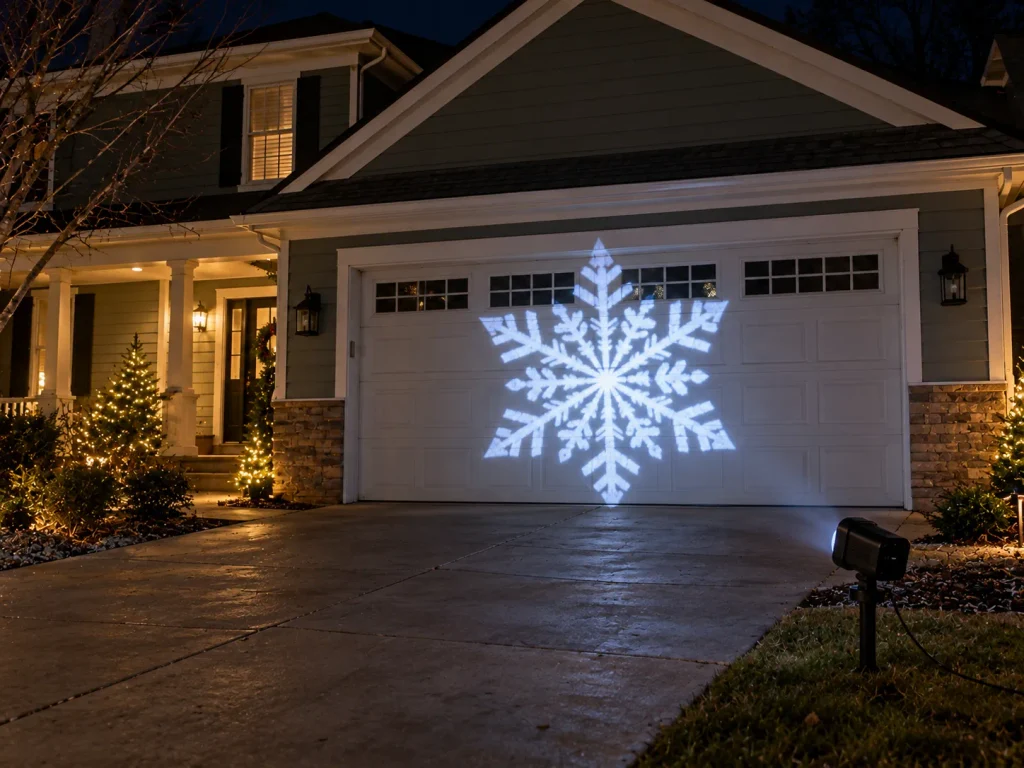
A garage door offers a broad, simple surface that often goes unused after the roofline is decorated. Projecting oversized snowflakes across it creates a crisp focal point without adding physical objects to the garage facade.
For a layered effect, keep the garage projection cool white or icy blue while the main entrance uses warm white. That contrast helps each zone feel distinct without competing for attention.
Test the projector angle after dark and check how the image changes when the garage door is open. Use a model suitable for outdoor conditions and follow the manufacturer’s mounting and power instructions.
Verdict: A large, clean projection can transform a blank garage face more effectively than a cluster of small decorations.
19. Wrapped Gazebo or Pergola Light Structure 🌟
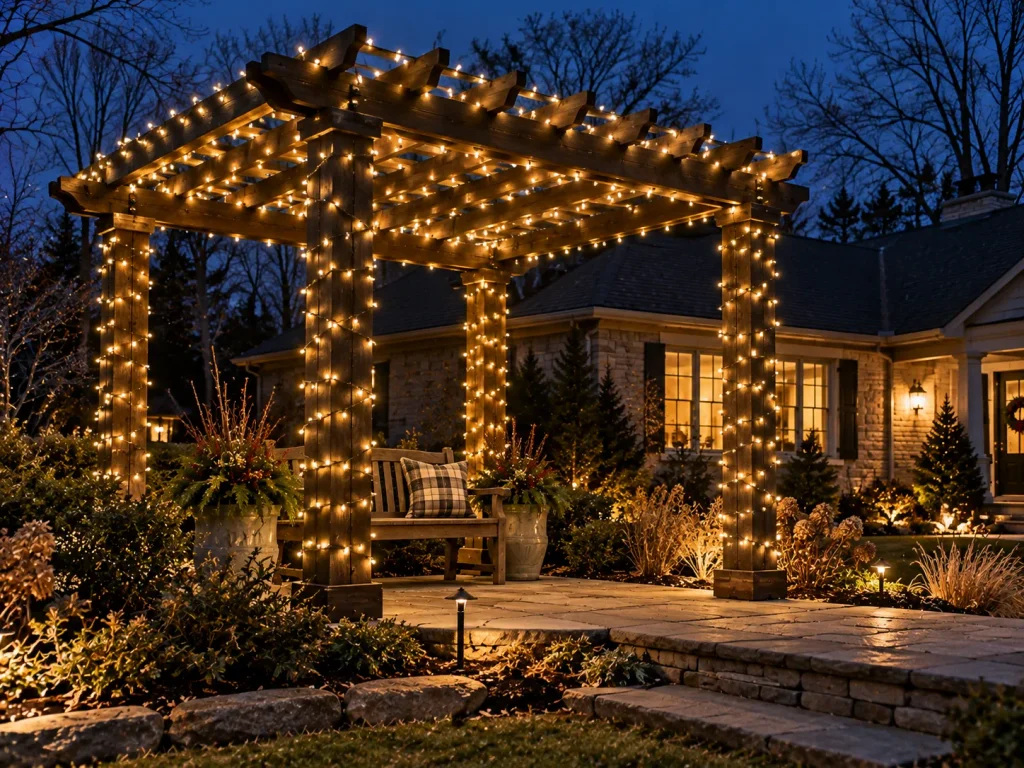
Begin with the structure’s outline: wrap the main posts first, then trace the beams across the top. Add a second layer of lights or greenery only after the basic shape is visible.
For a gazebo, hang lightweight ornaments or stars from selected beams to create an overhead canopy. For a pergola, use evenly spaced strands running across the rafters, keeping the central opening clear so guests can see the glowing structure from the yard.
Nobody needs to wrap every beam with several kinds of lights. One consistent pattern often looks more deliberate and takes less time to install and remove. Use outdoor-rated lighting and fasteners that won’t damage wiring or the structure.
Design verdict: Treat the gazebo or pergola as an illuminated room outdoors, not just another object with lights attached.
20. Light-Wrapped Mailbox and Lamppost 💡

Cost: $25–80 | Time: 30–60 min | Power: Battery or solar options where suitable; otherwise use outdoor-rated lights and a protected power connection
A mailbox or lamppost sits at the edge of the property, making it a useful opening marker for the entire display. Wrap the post in a consistent spiral of greenery or lights, then add one large weather-resistant bow near the top.
Keep the mailbox number visible and avoid blocking access for postal workers. For a lamppost, match its light color to the driveway or roofline so the property edge feels connected to the house.
The strongest version is simple: one wrapped vertical post, one accent, and a clear view from the street.
21. Synced Musical Light Show 🎶
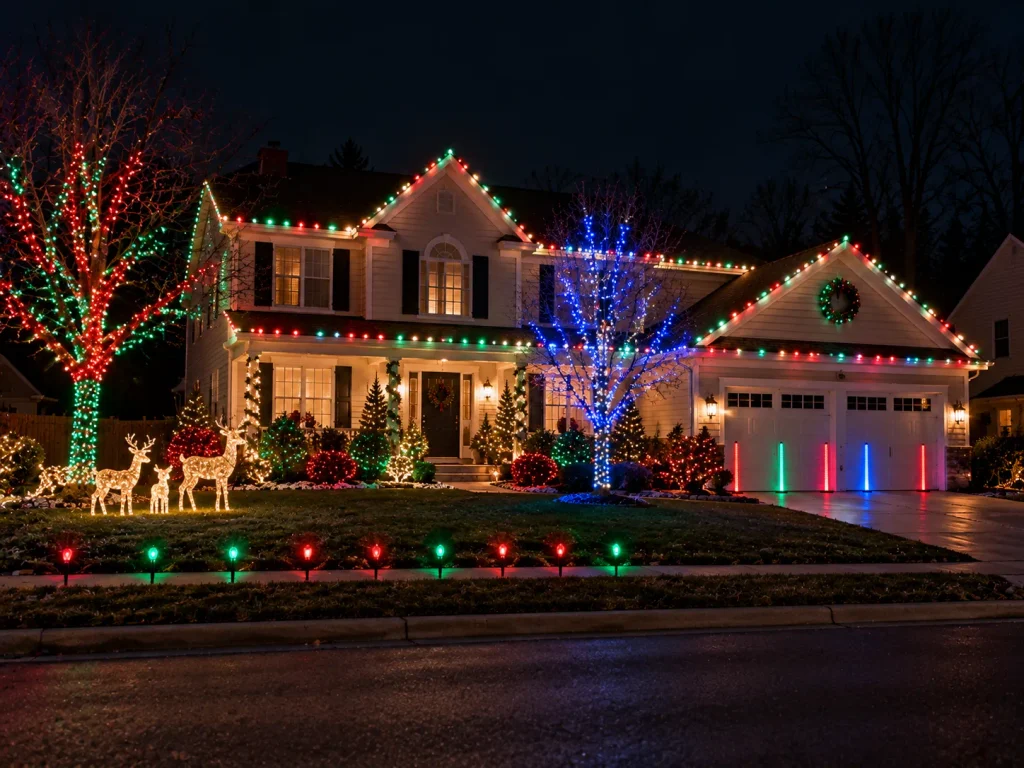
You’ve spent several weekends decorating, but passing cars see the display for only a few seconds. A synchronized light show gives them a reason to pause: lights across the trees, roofline, lawn, and house change in time with music instead of shining as separate, static features.
Start with a modest controller and a small group of compatible lights. Program a short sequence first, then expand the show in later seasons. A carefully timed display with a few clear changes can be easier to follow than dozens of effects running at once.
Plan the electrical layout before installation, check the combined power requirements, and keep cables away from vehicle and pedestrian routes. If broadcasting music, check applicable local rules and use a suitable low-power system where permitted.
Cost range: $150–400 for a starter setup; larger shows can cost much more Setup time: 4–8 hours in the first year; less once the system is programmed Surface transformed: Entire yard, across multiple zones Power needed: Suitable outdoor outlets and controller power; a dedicated circuit may be appropriate depending on the total load
🎄 How Do You Make Christmas Yard Decorations Feel Like One Display?
Connect the yard through one visual route rather than decorating every surface independently.
| Your main goal | Best ideas to combine |
|---|---|
| Create a walk-through experience | Inflatable archway + lantern walkway + tree canopy lights |
| Make the yard visible from the street | Tree canopy wrap + fence light curtain + roofline outline |
| Create a photo-worthy focal point | Silhouette scene + giant gift boxes + snowflake projection |
| Build a high-impact light show | Roofline lights + ground-level light field + synchronized music |
| Decorate a long driveway | Driveway borders + wrapped trees + mailbox or lamppost |
| Keep setup manageable | Projector + pre-lit ornaments + battery lanterns |
⚡ What Should You Check Before Installing Outdoor Christmas Lights?
A little planning prevents the display from becoming a tangle of cords and last-minute repairs.
- Check the power load. Add up the electrical requirements and follow each product’s connection limits.
- Use outdoor-rated equipment. The U.S. Consumer Product Safety Commission explains that seasonal lighting without key safety features can pose shock or fire risks.
- Protect outdoor connections. Follow product instructions for weather protection and ground-fault circuit interrupter (GFCI) protection.
- Secure decorations against wind. This matters especially for tall silhouettes, hanging ornaments, inflatables, and large gift boxes.
- Keep paths clear. Route cables away from walking areas, tires, and snow-removal routes.
- Inspect lights before use. Replace damaged strands instead of trying to hide broken wiring.
- Switch decorations off before bed or leaving home. Use an appropriate timer if you want a consistent schedule.
The Electrical Safety Foundation International also cautions against running extension cords through water or snow, overloading them, or using them as a permanent substitute for household wiring.
✨ Final Takeaway
The most memorable Christmas yard decorations make people feel as if they’re entering a holiday scene. Start with one strong feature, connect it to a second zone, and give guests a clear path through the display.
A glowing canopy, a framed driveway, and a synchronized light show can each transform a yard in a different way. Choose the concept that suits your space, budget, and setup time and build outward from there.