
Learn how to build a functional and stylish DIY sofa table with charging and storage (lots of storage!). This behind-the-sofa table DIY project includes full plans, tips, and a step-by-step guide.

If you’ve ever switched from traditional couches to a sectional, you probably know the struggle: no more space in the middle for a nightstand or end tables, and suddenly… nowhere to charge your phone, store remotes, or set down your coffee. That was exactly our dilemma.
We used to have a 3-seater and a 2-seater with the charging nightstand in between. It had all of our chargers, a drawer for the remotes, and served as a spot to put down your drink. But once we upgraded to a sectional, all of that functionality disappeared.

That’s why I built this custom behind-the-sofa table with charging ports, storage for remotes, a sleek walnut top, and even a custom side cabinet (because I will take all the storage we can get). It’s clean, modern, and packed with functionality.
***This post contains referral or affiliate links. It is a way for this site to earn advertising fees by advertising or linking to certain products and/or services. Please read my full disclosure here ***
How to Build the Behind-The-Sofa Table
As always, I have a detailed video showing how to build it. The step-by-step written tutorial follows below.
Step 1 : Measure and Cut the Boards
- Measure the length and height of your sofa. The height should be such that the top doors on the table are just above the back.
- Cut (3) 1×6 boards to the same length as your sofa. Mine was about 103″. The details are in the plans.
- Cut smaller pieces for vertical dividers inside the table.

Tip: Use a stop block on your miter saw for consistent cuts on the dividers.
Step 2: Mark and Cut Outlet Openings
- Decide where the power strips will go. I distributed them based on the distance from the power outlet on my wall.
- Measure and mark the cutouts for each outlet.
- Cut using a jigsaw, allowing an extra ⅛” around each outlet for easy fit.

- Cut a wire pass-through hole in the sides using a router or jigsaw. I forgot to do this and had to make the openings after staining and finishing using a router with a straight cut bit.
Step 3: Sand and Prep the Boards
Step 4: Assemble the Main Table Box
- Mark divider positions on the base board.
- Use wood glue, clamps, and brad nails to attach dividers at right angles.

- Attach the side boards to form a box.

Tip: Right-angle clamps make this process easier and more precise. I used these clamps that I recently discovered and they definitely made it easy to hold the boards in place to attach.
Step 5: Stain and Seal the Table Box
This is a great time to stain or paint and seal the table box. I decided to go with dark walnut stain because I was going to be using walnut plywood for the top. Be sure to apply pre-stain conditioner.

See more about how to stain wood.
Step 6: Build and Prep the Cabinet & Doors
- Cut plywood for the side cabinet and all doors.
I used walnut plywood for visible doors and birch for the cabinet box. I was able to use up “scrap” cut-offs left over from other projects for both the walnut and birch plywood. Win-win!


Step 7: Install the Doors
- Make the holes for the hinges using a hinge jig.
- Apply boiled linseed oil to the walnut doors before installing the hinges
- Use spacers to align doors and attach hinges. See the video for details on how to get the best alignment.


Tip: A right-angle drill adapter helps get into the tight spaces.
Step 8: Build the Support Frame
- Cut 2×4 boards and build support bases with wood glue and 2-1/2″screws. Be sure to predrill before adding the screws.

These will hold up the entire table behind the sofa. I made three stands so I could have them spaced evenly across the table length. You may need more or less, depending on the length of your table.
Step 9: Final Assembly
- Position the support bases evenly along the length of the sofa and place the table and cabinet on top.
- Screw the table to the supports from underneath using 2″ screws.

- Attach the side cabinet door.

- Plug everything in and push the sofa into place!
And that is it!

Grab the Plans
Want to build your own version? I’ve created detailed step-by-step plans and a complete supply list to help you make this project. Click on the button to get the plans.
It’s a pretty straightforward build and uses just a few tools. Now we have the perfect behind-the-sofa setup:
- Power outlets within reach
- Space for remotes and tech
- A beautiful walnut top to put down our drinks
- Extra hidden storage
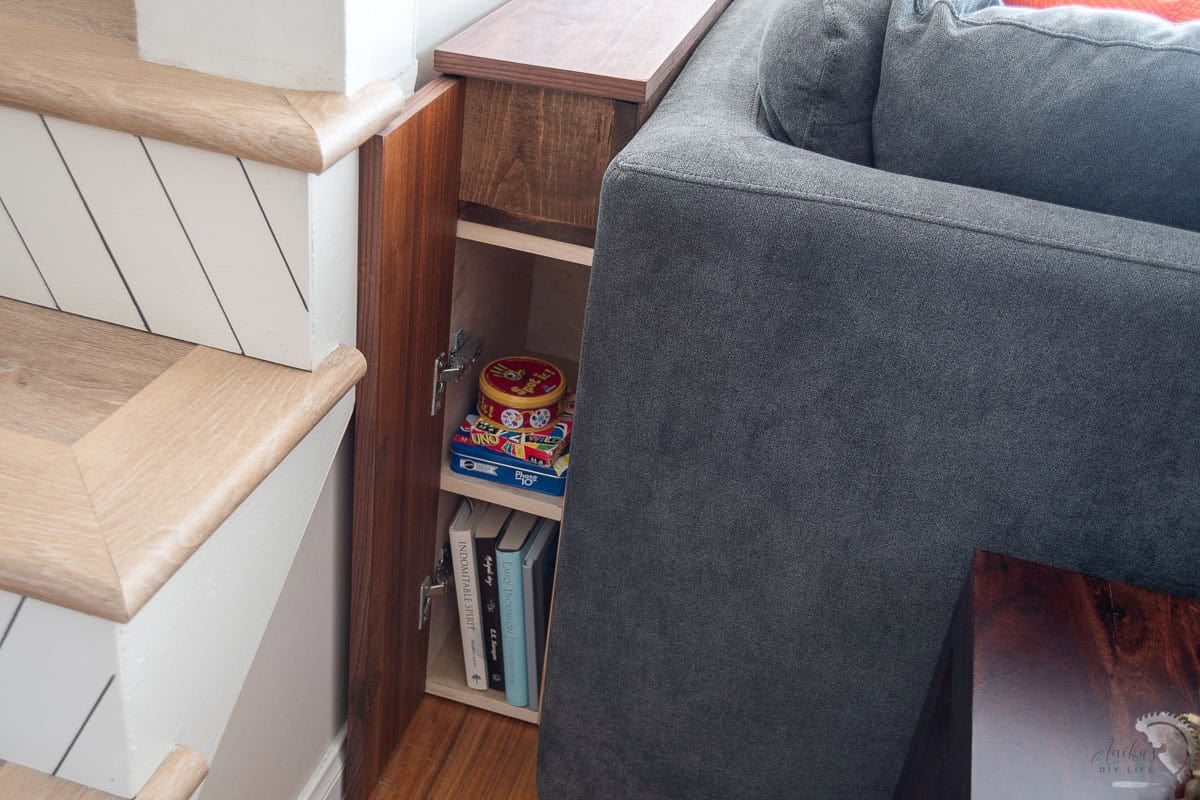
All of this in a slim, modern table that adds function and style to our living room.
And the best part? You don’t need a fancy workshop or a massive tool collection to make it happen. Just a few basic tools, some thoughtful planning, and a little bit of patience, and you’ll have a custom piece you’ll use every single day.

You might also like:
