
Learn how to build a versatile wooden DIY tiered organizer shelf with this step-by-step tutorial and build plans. It is perfect for the kitchen, bathroom, or office.

DIY Wooden Tiered Organizer
This tiered organizer is a great way to organize any countertop or desktop. It is a versatile organizer and works well to organize many spaces:
- Spices in the kitchen
- Create a coffee station.
- Organize your makeup and toiletries in the bathroom.
- Keep your desk supplies organized.
- It can even be used for display and serving dessert!
It is verstaile and has a simple modern design that adds a nice touch to any space.

It is also very easy to build and uses mostly 1×2 boards and a couple of common woodworking tools – a saw to make the cuts and a nail gun or power drill to join. You could possibly make this out of existing scrap wood, too!
I highly recommend a miter saw because it easily cuts accurately. The project also has an angled cut, which is a lot easier to make with a miter saw.
I have you covered with the build plans, video, and a step-by-step tutorial.
***This post contains referral or affiliate links. It is a way for this site to earn advertising fees by advertising or linking to certain products and/or services. Please read my full disclosure here ***
Material Needed
Tools Needed
How to Build
Step 1: Prepare the Boards
I am using pine for this project. You can use any wood. Pine is relatively inexpensive and is great for starter projects. However, it is soft and can be dented easily.
If you are looking for a durable project, I recommend using a hardwood like walnut, oak, or maple – depending on the final look you are going for.
Step 2: Build the Shelves

Alternatively, if you don’t have a nail gun, you can also use a power drill and countersunk trim-head screws.
- Attach the longer 1×2 boards to the front and back to complete the shelves.

If you need help keeping the boards aligned, I recommend using a few clamps to help.
Repeat the above for all three boards. This makes three shelves.
Step 3: Create a Template
The trays are evenly spaced, and the best way to make sure they are attached at the right spacing is to create a template using masking tape on the floor or table.
- Measure and mark 6″ spacing and apply the masking tape.
- Align the shelves to the masking tape.
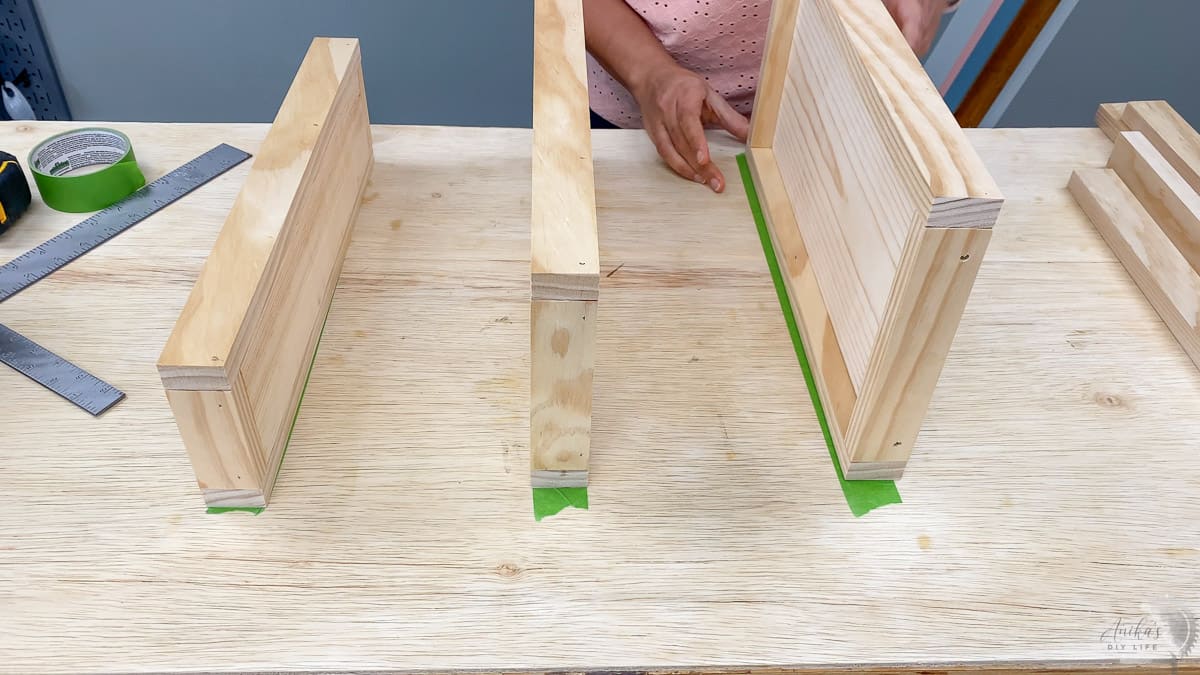
Step 4: Attach the Legs

- Attach the front leg (with the ends cut at an angle) to the front of the shelves.

That is it! The shelf is ready!

Step 5 – Final Finish
- Fill all visible nail holes with wood filler. I like this wood filler, which is stainable and works well.
- Paint or stain in the color of your choice. I used American Walnut stain for my shelf.
- Apply a good quality top coat. This one is my favorite. I apply three coats of top coat with light sanding using ultra-fine grit and wiping off the dust between each coat.
Related: How to stain wood for the best results.
And done!

Printable Plans for the Tiered Organizer
You can build your tiered organizer with the detailed plans below, which include the cut list, diagrams, and step-by-step illustrations. Click the button below to access the plans.
It is a simple and quick project. It took me about 3 hours to build this, but I was taking pictures and filming the whole way, which usually makes projects a lot longer. I bet you can quickly build this in under an hour.
It has many uses. It can be used in the kitchen as a coffee station.
Or to organize office supplies.

I am actually currently using it in my bathroom.
Where will you use it?
If you build it, I would love to see it! Feel free to email photos to me at [email protected] or tag me on Instagram @anikasdiylife for a chance to be featured on social media! I can’t wait to see what you build!
You might also like:
