
Get the plans to build a DIY shoe rack that can be easily painted to look like a shoebox from your favorite brand!

PIN THIS TO PINTEREST
One of the readers reached out and asked if I could help make plans for a shoe rack that looked like a shoebox. I loved the idea and put one together for him. I have the plans available for you as well!
You can download the printable plans at the bottom of the post.
Material Needed –
How to Build
Step 1 – Make the cuts
- Make the cuts per the plans.
- Make pocket holes as shown in the plans.
Step 2 – Attach the shelves
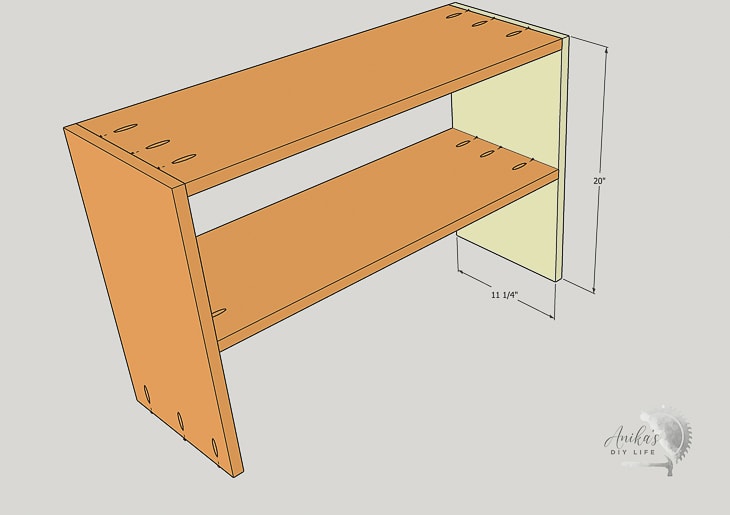
Attach the shelves to one of the sides as shown using wood glue and 1-1/4” pocket hole screws.

Step 3 – Attach other side
Attach the other side using 1-1/4” pocket hole screws and wood glue.
Step 4 – Attach top
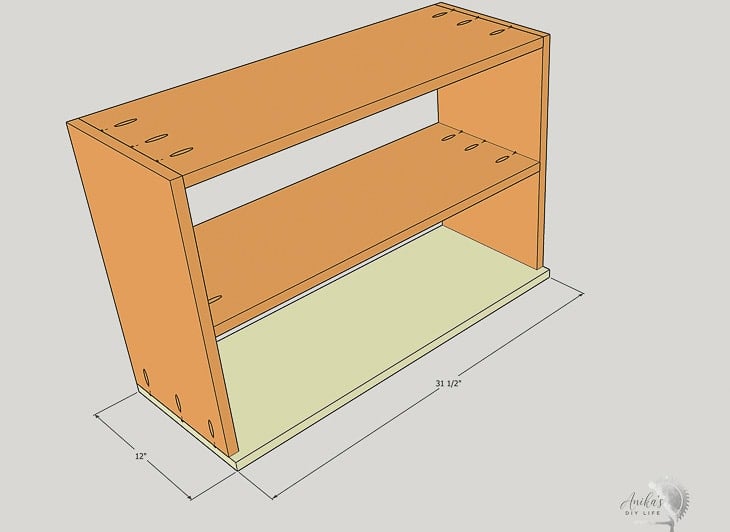
Attach the top plywood/mdf using 1-1/4” pocket hole screws through the pocket holes on the sides. Use wood glue.
Step 5 – Attach Front Trim
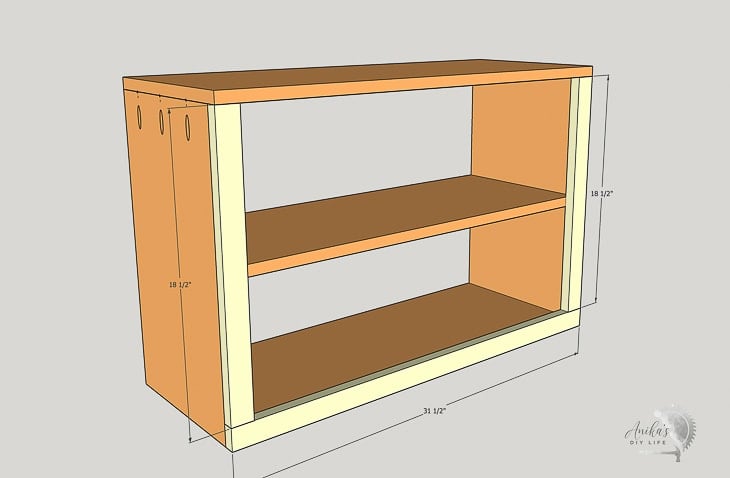
Attach the side and bottom 1×2 trim using wood glue and finish nails.
Step 6 – Attach the top trim
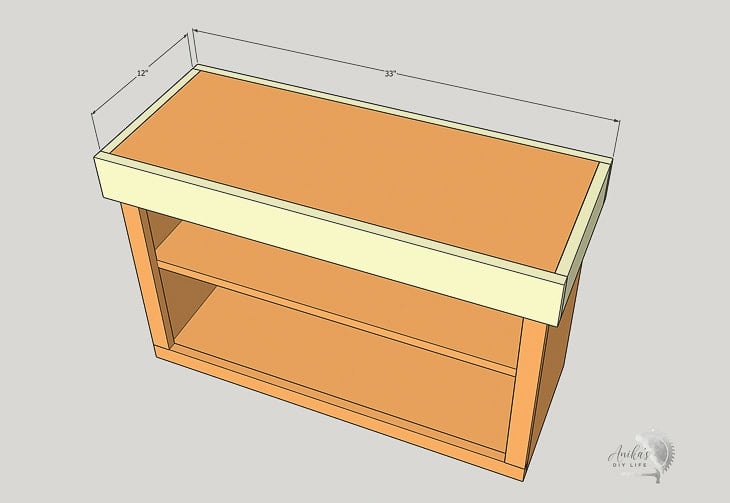
Attach the 1×4 trim for the top all around using wood glue and finish nails.
Step 7 – Add back
Attach the 1/4” back panel using wood glue and finish nails.
That is it! You can add store bought feet if you like or attach blocks of 2×2 or 4×4 to make feet. The Shoe rack works as is without the feet too.
Paint it in color of your choice and add your favorite brand stickers to make it your own!

It’s a simple and easy! It makes a great beginner-friendly project.
PIN THIS TO PINTEREST
DIY Shoe Rack Printable Plans
Click below to have the printable plans emailed to you.
CLICK HERE TO DOWNLOAD PLANS
More Easy DIY Organization Projects –
[mv_create key=”136″ type=”diy” title=”Simple DIY Shoe Rack” thumbnail=”https://www.anikasdiylife.com/wp-content/uploads/2021/04/diy-shoe-shelf-Anikas-DIY-Life-sq-10.jpg”]